How to Flush Your Radiator and Replace the Coolant

Flushing the radiator and replacing the coolant is something that must be accomplished periodically. This is done to prevent your engine from overheating and keep the inner workings of your cooling system free from contaminants. You can always delegate this task to a certified mechanic, but if you want to save on maintenance expenses, or prefer to get your hands dirty from time to time, a radiator flush is easy enough to do, and you can even perform it in your own garage or driveway.
What you'll need
Make sure you have the following things handy before you begin:
- Drain pan/bucket (with at least 15-liter capacity)
- Screwdriver or wrench (depending on your type of drain plug)
- Radiator flush solution
- Distilled water
- Running faucet with hose (a pail of water will also do)
- Fresh coolant
Prep the car
Park your vehicle on a flat surface, and make sure the engine is cool to the touch. Keep pets and children away from the work area, as coolant is poisonous. Have your pan or bucket ready underneath the drain plug to catch the spills.
Drain the coolant
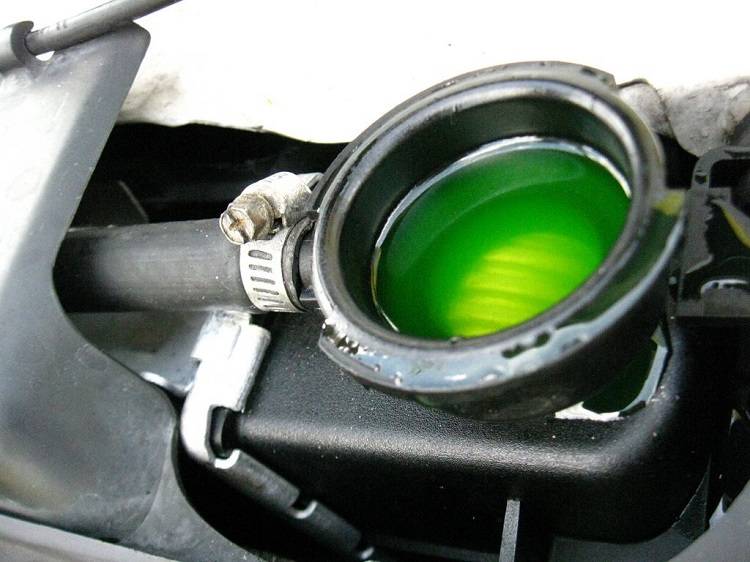
Remove the radiator cap and drain plug. The radiator cap will be located on top of your radiator, and the drain plug somewhere at the bottom. If you don’t know where the drain plug is, check your owner’s manual, or do a visual inspection. Depending on your vehicle type, the drain plug will either be a screw, bolt, or petcock that you can open by hand. Open the drain, then let the coolant flow until it stops. Put the plug back in to close the drain, then dispose of the waste in an environmentally-friendly way.
Add the radiator flush solution
Pour your radiator flush solution through the open radiator cap, then fill it to the top with water. Replace and tighten the radiator cap, then start the car and let the engine run for up to 10 minutes. Make sure you have the gear on neutral before you do. Afterwards, turn the engine off and wait for it to cool. Never open the radiator cap if the engine is still hot to the touch as you could get scalded by the hot water inside the radiator.
Drain the radiator flush solution
Once the engine has cooled, replace your pan or bucket underneath the radiator, then open the drain plug and let the solution flow. Replace and tighten the drain plug once it’s done.
Refill the radiator
Check your owner's manual to learn the number of liters or quarts that your cooling system holds. Many coolant products today come diluted with distilled water, but if you're pouring pure coolant, you will have to pour only half of the cooling system's capacity and then fill the rest with distilled water. You may need to use a funnel to avoid spills.
Run the engine to circulate the fresh coolant
Tighten the radiator cap, then run the engine for up to 10 minutes to disperse the coolant and water evenly throughout the system. Turn off the engine, and you're done.
Make sure to dispose of your used coolant properly. Likewise, check your radiator after a few days of use to ensure the coolant level is optimal. If it is low, add equal parts coolant and distilled water to the reservoir.
 ©popularmechanics.com
Featured Articles
- Latest
- Popular
-
BYD introduces Sealion 7 in PHRuben Manahan IV . May 28, 2026
-
-
10th PIMS: 10 things to watch out forPaulo Papa . May 25, 2026
-
CAMPI-TMA Apr. 2026 sales drop by 12%Ruben Manahan IV . May 25, 2026
-
GAC PH expands lineup with Aion UT introductionRuben Manahan IV . May 21, 2026
-
Deepal PH establishes first-ever showroomPaulo Papa . May 21, 2026
-
CAMPI-TMA Apr. 2026 sales drop by 12%Ruben Manahan IV . May 25, 2026
-
-
BYD introduces Sealion 7 in PHRuben Manahan IV . May 28, 2026
-
10th PIMS: 10 things to watch out forPaulo Papa . May 25, 2026
Recommended Articles For You
-
-
-
-
-
-
Honda PH: Be a better rider during lockdownRuben Manahan IV . Jun 25, 2020
Featured Cars
- Latest
- Upcoming
- Popular
Car Articles From Zigwheels
- News
- Article Feature
- Advisory Stories
- Road Test
-
Mitsubishi set for Pajero reintroduction in Q4 2026Ruben Manahan IV . May 29, 2026
-
MG Motor PH to showcase three new nameplates at PIMS 2026Cesar Miguel . May 29, 2026
-
Toyota ambassadors Ben&Ben to perform at upcoming PIMS 2026Cesar Miguel . May 29, 2026
-
Mitsubishi Motors PH to unveil all-new Outlander at PIMS 2026?Ruben Manahan IV . May 29, 2026
-
Subaru PH to bring Crosstrek e-Boxer HybridRuben Manahan IV . May 29, 2026
-
3 reasons to buy the BYD Sealion 7 EVCesar Miguel . May 29, 2026
-
Here are the Dongfeng Vigo’s strengths, weaknessesCesar Miguel . May 27, 2026
-
3 reasons to be excited about the Toyota Land Cruiser FJCesar Miguel . May 26, 2026
-
Here are the GAC Aion UT’s 2 closest rivalsCesar Miguel . May 25, 2026
-
Check out the Toyota bZ4X's 4 electrifying tonesPaulo Papa . May 20, 2026
-
Tips on how to prevent vehicle firesCesar Miguel . Mar 17, 2026
-
How to prepare your car for summerCesar Miguel . Mar 11, 2026
-
Avoid road trip horror stories this 'Undas' with these tipsRuben Manahan IV . Oct 20, 2025
-
Here are ways to avoid road ragePaulo Papa . Sep 23, 2025
-
How well do you understand traffic signs?Cesar Miguel . Sep 09, 2025
-
ELECTRIA: VinFast VF 6 is a well-equipped urban warriorCesar Miguel . Apr 20, 2026
-
BYD DM-i lineup conquers Southern LuzonCesar Miguel . Mar 10, 2026
-
Hyundai Creta Premium: balancing engaging drive,comfortCesar Miguel . Feb 13, 2026
-
First drive: 4th-gen Changan CS55 PlusPaulo Papa . Feb 09, 2026
-
Changan CS15: small upgrades makes the differenceCesar Miguel . Feb 06, 2026

